 |
Last additions - 1999 Jeep WJ pics |
 |
|

968 viewsNow I replaced the plastic bumper cover so I cut start cutting it. Mar 11, 2019
|
|
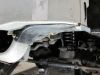
997 viewsView of the inner fender folded around and bolted to the lower part of the metal inner bumperMar 11, 2019
|
|
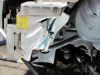
990 viewsI did another small cut and bent the metal around to protect the washer fluid reservoir. Mar 11, 2019
|
|
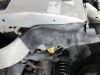
955 viewsAgain, saving the plastic inner fender I wrapped it around the reservoir and screwed it to the metal bumperMar 11, 2019
|
|
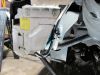
1037 viewsDriver side has a windshield washer fluid reservoir that is definitely in the way. if you are planning on serious off roading this MUST be removed completely. If you still need one you can get on out of an XJ that mounts up near the brake master cyl that uses the same plug ins etc. Mar 11, 2019
|
|
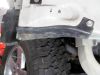
1041 viewsI manipulated the inner fender and wrapped it around the horns and screwed it to the front metal bumper Mar 11, 2019
|
|

912 viewsMetal cut and bent, horn wires relocated I am going to save the inner fenders too. (something else most people do away with when doing this) Mar 11, 2019
|
|

956 viewshorn wires in the wayMar 11, 2019
|
|
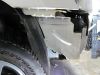
913 viewsPass side. That piece of metal is usually completely removed on these type of jobs but, I decided not to. I cut it and bent it over where the two horns are. I had to modify the horns position so that the wires came down from top instead of sticking out the back which worked well. Mar 11, 2019
|
|

922 viewsBumper cover removed. Mar 11, 2019
|
|
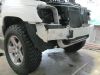
954 viewsBumper cover removed as I begin the trimming of the front Mar 11, 2019
|
|
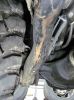
1019 viewsI expected it to rub the lower short arm but it does not. Many use wheel spacers due to that but I will not have to. Mar 11, 2019
|
|
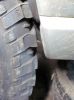
897 viewsA bit close on back of front fender ! Mar 11, 2019
|
|
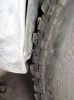
916 viewsA bit close on front bumper ! Mar 11, 2019
|
|
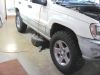
925 viewsAFTER the lift. Mar 11, 2019
|
|
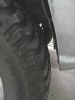
941 viewsHere you can see how close the front ones are to front bumper Mar 11, 2019
|
|

909 viewshere is height AFTER the lift and rims/tires. Between the 2.5 lift, new isolators and shocks, I managed to get a total of 6 inches of lift. (was 31 inches) Mar 11, 2019
|
|
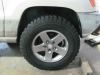
942 viewsHere you can see how close the front ones are to back of fender Mar 11, 2019
|
|

929 viewsPretty close on rear but should not be a problem, if it is I`ll trim it. Mar 11, 2019
|
|

918 viewsPretty close on rear but should not be a problem, if it is I`ll trim it. Mar 11, 2019
|
|

1022 viewsnew rims /tires mounted Mar 11, 2019
|
|

1024 viewsNew rubber plug replaced and grease topped off. Mar 11, 2019
|
|
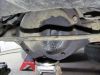
1014 viewsRear differential drain plug (if you can call that rubber pos that) leaking so I replaced it with new one and topped off rear end grease as axle grease seals were leaking into the breaks. I will be rebuilding the rear end soon as it has been roaring since I bought it. Mar 11, 2019
|
|

946 viewsOther side all done, not much prying needed there either. Mar 11, 2019
|
|
|
|


