 |
Most viewed - 1999 Jeep WJ pics |
 |
|

1012 viewsHad to clean all this up and sand it good and painted with rust inhibitor (POR)
|
|

1010 viewsPainted with POR
|
|

1010 viewsAfter the first couple of coats of black trim paint. Plastic trim was in bad shape and had been painted before with a gray that was too light and was a shoddy job it was flaking off so a LOT of sanding had to be done to get it all off and prepped for some good paint done correctly.
|
|

1009 views1999 Jeep Grand Cherokee Laredo / 4.0L BEFORE installing a 2.5 inch spacer lift kit from Supreme Suspensions, Bilstein shocks, and a front driveshaft conversion from Rzeppa/Rzeppa type (CV) to a Double Cardan type (U Joint) .
|
|
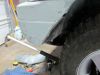
1009 viewsI reused the cut pieces and riveted them back to the trimmed bumper corners so I would have a nice edge instead of a narrow cut one and a way to mount the inner fenders back to it. I would epoxy glue those later in this process for stability as those rivets would never last by themselves under off roading conditions.
|
|
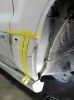
1009 viewsThe first one took me a few hours as I was designing and figuring out how much to cut etc as I went. Taped off the final measurement remembering to leave some to make a folded edge out of.
|
|

1008 viewsFactory setup
|
|

1008 viewsold and new yokes and old and new seals
|
|
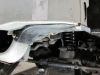
1008 viewsView of the inner fender folded around and bolted to the lower part of the metal inner bumper
|
|
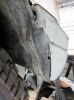
1007 viewsWorking out a way to mount the inner fender to the newly trimmed bumper cover so I wouldnt have to cut it as well. It worked out perfect.
|
|

1006 viewsNew yoke installed on TC
|
|

1006 viewsdriveshaft mounted to front diff
|
|

1006 viewsAFTER trimming the fender (I will trim that top part later after I see if I go with a bushwhacker flare OR if I do something custom) For now I have all the clearance i need and it doesnt look that bad but that will get trimmed eventually !!!
|
|
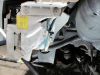
1003 viewsI did another small cut and bent the metal around to protect the washer fluid reservoir.
|
|

1003 viewsnew rims /tires mounted . These are JK take offs and are 255/75.17 so the tires are 32.5 inches tall.
|
|

1002 viewssanded and ready for priming
|
|

1002 viewsTaping it up to paint the trim black
|
|
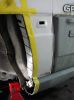
1001 viewsFolded it over to make the new edge
|
|
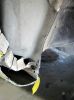
999 viewsPinch weld ground back significantly. Most people beat that over flat or cut it out and weld a flat piece back. Not needed in my case. any larger tire and I would have to.
|
|

999 viewsAFTER painting the trim black ! And a new black grille,,
|
|

996 viewsBadly worn and dry rotted rubber isolators and rusted frame towers
|
|

996 viewsNew isolators and spacer installed
|
|

996 viewsremoving the lower coil sporing isolator from rear coil . Rusted but nowhere near as bad as front. Cleaned and sanded well and painted with POR.
|
|

995 viewsThe coil spring towers were extremely rusted out. I did not both with replacing these as I am not planning on doing hardcore off roading otherwise I would have cut those off and welded in a repair kit or fabricated something.
|
|
|
|


