 |
Most viewed - 1999 Jeep WJ pics |
 |
|

970 viewsnew u joint mounting clips and bolts (came with driveshaft from IRO) and some assorted locktite. (blue for u-joint screws and red for yoke nuts)
|
|
969 viewsTrim cut to fit and ready to mount
|
|
968 viewscleaned the panel
|
|

968 viewsFront after trimming
|
|

968 viewsBadly rusted front tower
|
|
967 viewsAgain, saving the plastic inner fender I wrapped it around the reservoir and screwed it to the metal bumper
|
|
967 viewsremoved one piece of tape and cut slits all the way down the piece so it could be folded over to make a nice edge. Not only to eliminate the sharp thin edge but, to make it stronger and to have something to mount the trim piece back to once I cut it down to size.
|
|
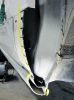
966 viewsAnother view of the slits I cut in it.
|
|
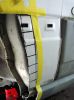
966 viewsCut the slits
|
|
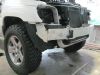
965 viewsBumper cover removed as I begin the trimming of the front
|
|

963 viewshorn wires in the way
|
|

963 viewssecondly I trimmed a bit off the back edge of the side of it. I did end up taking a wee bit more than pictured here.
|
|

963 viewsDriver side inner fender remounted
|
|
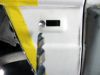
962 viewsHad to drill the slot out so the plastic mounting tab on the trim would fit back in
|
|

962 viewsAFTER trimming bumper and fender
|
|

961 viewsremoving old isolator
|
|

961 viewsTo prevent death wobble I installed a new high perf offroad steering damper shock, out with old and in with new.
|
|
959 viewsCut the first section out
|
|

958 viewsNow moving to the rear
|
|

957 viewsGrinding the pinch weld back on driver side
|
|

955 viewsOther side all done, not much prying needed there either.
|
|
955 viewsHere you can see how close the front ones are to front bumper
|
|
955 viewsFirst piece cut out.
|
|

955 viewsTaping it up to paint the trim black
|
|
|
|


